
Nervous about making the wrong artwork and information public? Haven’t turned on your Public Page yet because you don’t want a mix up? Not to worry, follow these guidelines to set up your Public Page and share just what you want. Then you can promote your Public Page with confidence.
Your Public Profile is an easy and professional way to showcase your work and share who you are as an artist. It's a great way to gain additional exposure, boost SEO, and is an invaluable asset for any artist looking to grow their business. It’s also linked directly to your inventory, so you never have to worry about separately updating the works on the Profile.
Did you know that you can sell work through your Public Profile? Interested buyers can easily ask about a specific piece through the “Inquire About Piece” button. Buyers can even start to set up a sale by sending you a "Purchase Request" for an artwork. Once you have a buyer for a work, you can process the sale. Artwork Archive has the option for you to be paid directly for your sale with the PayPal integration on Artwork Archives invoices. You can create and send an invoice and be paid directly through that invoice!
Enjoy the benefits that your Public Page and Discovery can bring by following these 10 simple steps. Fingers crossed you’ll be another Artwork Archive success story like Lawrence Lee and Rebecca Crowell!
UPDATE: We’ve made the Public Profile even more amazing! Take a look at what’s new.
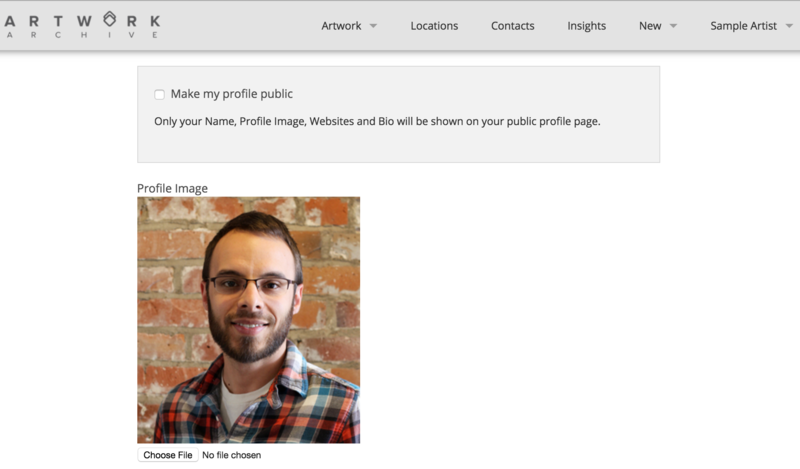
STEP ONE: ADD A PROFILE IMAGE
First things first, choose a high-quality profile picture for your Public Page. This can be a photo of you or you with your artwork.
-
Hover over your picture on the top right and click “Edit Profile”.
-
Scroll down to “Profile Image”.
-
Click “Choose File” to choose your photo. We support JPEG and PNG files.

STEP TWO: ADD YOUR WEBSITE
Next, add in your website if you have one. This will appear as a globe icon on your Public Page, so interested buyers can click and learn even more about you and your art.
-
Scroll down to the “Website” section under and to the left of the “Profile Image”.
-
Add in your artist website url.
STEP THREE: ADD IN YOUR CONTACT DETAILS
Input the contact details you want. This information will be used when you create consignment reports, portfolio pages, and inventory reports. Inventory reports are perfect to send to interested buyers and galleries who want to see even more of your work.
-
Scroll down to the “Phone” and “Address” boxes under the “Profile Image”.
-
Add in the contact details you wish.
STEP FOUR: SET UP YOUR BIO
Then set up your bio. Many of our artists “copy and paste” in their artist statement or bio from their website. If you do not have these at the ready, check out our articles on writing a captivating artist bio and an artist statement. Need inspiration? Check out a few of our favorites: Cynthia Feustel, Sergio Gomez, and Jeanne Bessette.
-
Scroll down to the “Bio” section.
-
Fill in the information you’d like to include.

STEP FIVE: ADD YOUR SOCIAL MEDIA LINKS
These social media URLs become icons on your Public Page for interested buyers to learn more about you and your work. Your social media URLs are the unique URLs (web addresses) attached to your social media profile pages. Make sure to input the URL, not the username. To add Facebook for instance, go to your Facebook Profile Page (not the Newsfeed) by clicking on your name in the top right corner of Facebook. For Instagram, log in to Instagram.com on your computer (not the app on your tablet/phone) and click on your username in the right hand corner. Use this web address as your Instagram URL.
-
Scroll down to “Your Social Links for the Public Profile Page”.
-
Add links to the social media channels you would like to include. The more the merrier!
STEP SIX: SAVE
Scroll down and hit save!

STEP SEVEN: MAKE YOUR PUBLIC PAGE PUBLIC
The “i”s are dotted and the “t”s are crossed and you’re ready to turn on your Public Page.
-
Hover over your picture on the top right and click “Edit Profile”.
-
Check the box “Make my profile public” in the gray box.
STEP EIGHT: SELECT WHAT PIECE INFORMATION IS SHOWN
You have control over what is shown on your Public Page. You can decide if you want prices, “sold” markers, creation dates, and collections shown (as well as Pieces, of course!)
-
Scroll down to “Public Profile Options” in the gray box.
-
Select the information you would like to show on your Public Page.
STEP NINE: SAVE
Scroll down and hit save!

STEP TEN: CHOOSE YOUR PUBLIC PAGE PIECES
Now comes the fun part! Choose the Pieces you’d like to display to interested buyers on your Public Page. Each Piece’s title, medium, subject matter, and description will be displayed automatically if they have been previously recorded. Notes will always stay private.
-
Hover over your picture on the top right and click “Share Settings” (you may have to refresh).
-
Click the bar to the far right of your Piece to switch it to Public. Click it again to change it back to Private. Your changes will automatically save.
-
You’re done!

SHARE YOUR PAGE
Now you’ve set up your Public Page just how you want it, you can share this beautiful online portfolio. All users can go to their Public Page (click “Public Page” under your name) and share that URL. From newsletters to social media, here are eight great ways to get the word out and promote your art. Our subscribers will also have their Public Page exhibited on Discovery.
Want to manage and grow your art business? Sign Up for Free Here.


