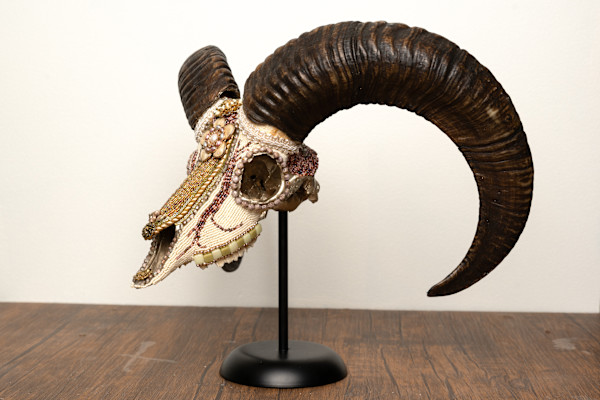
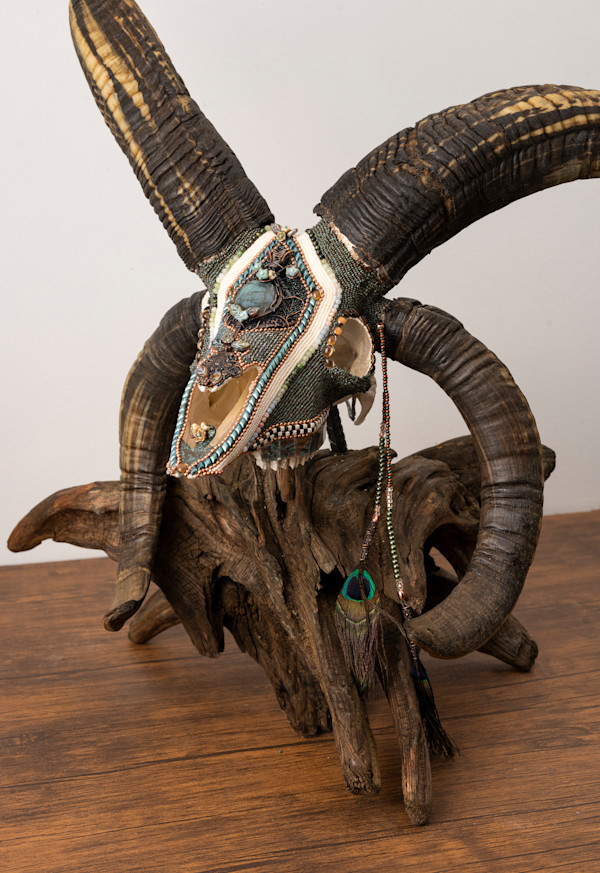
In September, I picked up some early work from a gallery, among them was this Muflon Sheep from 2022. I continually noticed how my technique has grown and changed in the past few years, and this was a perfect example of this growth.
My first order of business was removing all old beads, which is done utilizing a heat gun and scraping off old beads. There was also some tile/grout along the jawline that had to be chiseled off with a hammer and file.
The next order of business was sanding down the entire surface to remove old adhesive. After smoothing, I added a few layers of bondo to cover holes and small crevices, which I have learned make for uneven adhesion of beads.
At the beginning of my work, I tried to work with and around these uneven surfaces. But, as my practice evolved, and my tools became finer, my desire for even rows and uninterrupted patterns in the bead placement became more important to me. As any craftsman knows, the preparation of the surface becomes paramount to satisfaction in the finished product.
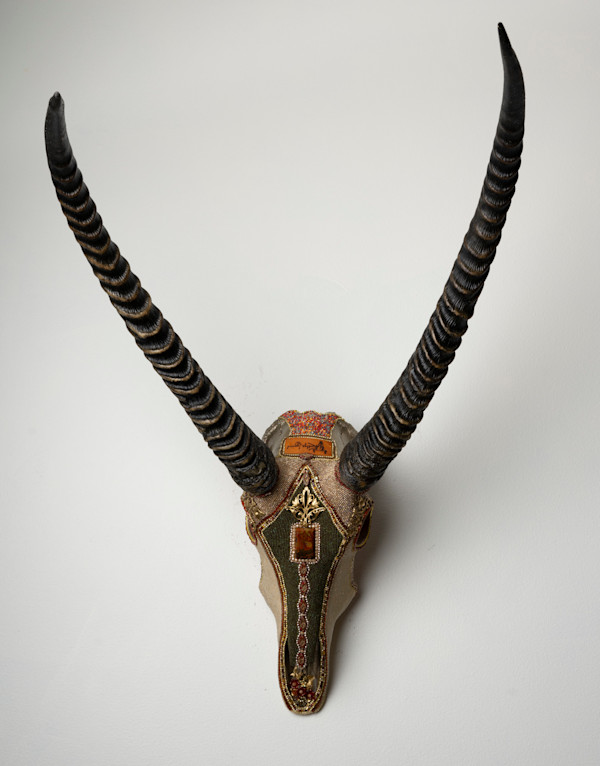
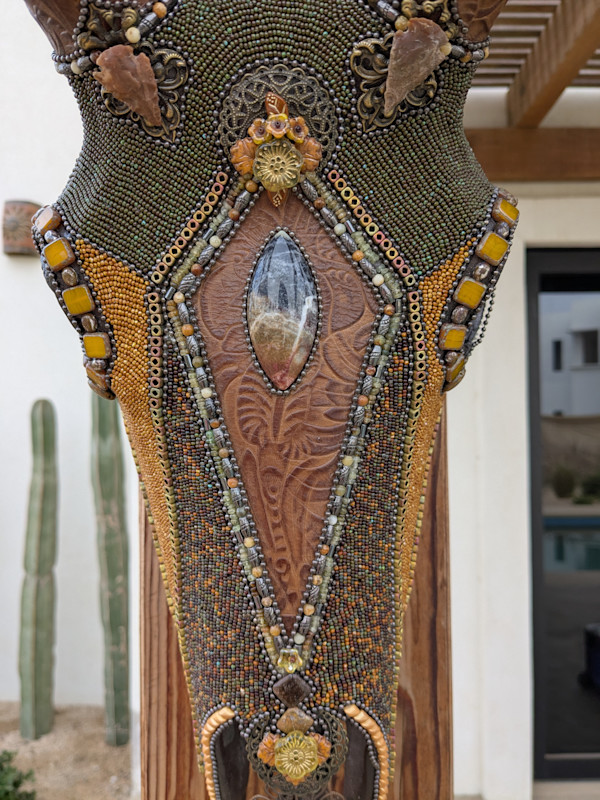
In addition to the amount of work that goes into preparing the surface, I was struck by the difference in the tesserae/components I had available to me today, compared to the selection I was working with only a few short years ago. The original piece was made of only about 6 different "ingredients": mixed glass seed beads, a goddess charm, copper ball chain, leather and glass tile.
As I began assembling my tray of possible "ingredients" for my new piece, always one of my favorite parts of the process, I relished the rediscovery of new findings and combinations of colors and textures.
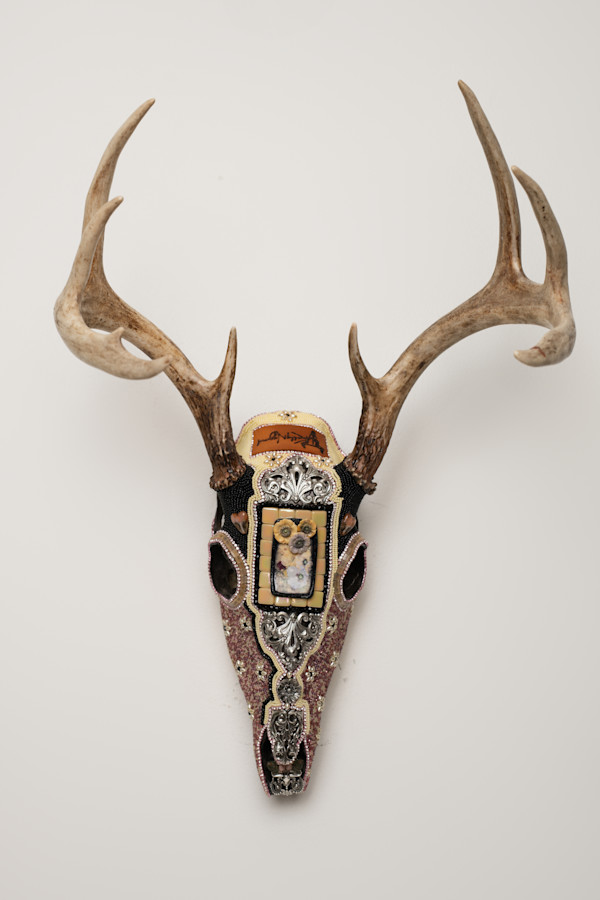
I started with a new vintage hand carved plaque I found @Twelve Vultures on a recent expedition. It was black, and featured a mounting method that allowed for the horns of the sheep to protrude on display. In the past, sheep with this type of horn going off to the rear have been a challenge for mounting options, because they will not hang flat or set on a shelf without modification. I've learned a thing or two about mounting techniques as well!
So, my basic concept for my redo piece was based on the black plaque the finished work would display on.
Black can be a limiting design concept, because so much detail in lost in the darkness, so I always like to punctuate it with extra sparkle and brightness as a contrast. I chose pink and white, because I wanted to use an element from a Brighton Collectibles pendant I had in my collection. I had worked for Brighton from a number of years, and often find inspiration in old pieces from my collection.
In all, I started this skull on 12/15 when I found the plaque, worked on preparing the surface during the week, and actually started beading on Saturday, 12/21. The sheep is a relatively small surface, so there isn't as much ground to cover, but, the horns are permanently adhered, so working around them is a challenge in both placement and lighting. I would say the beading part probably took me about 15 hours. I finished up late Sunday evening with a light glue wash and let dry overnight.
Today, I will be applying sealing spray, cleaning up edges, removing accidental splashes of adhesive & paint on horns, and polishing the horns.
Then, it will be ready for mounting. As usual, I have not considered the details of the mounting technique prior to completion of the work - much to my long suffering husband's chagrin- so final repairs will likely be required. Sorry, Mike.
- Collections: Beaded Skulls
Other Work From Kelly Nygard